creaContours home page > End-User Guide > Basic interface options
Introduction
| |
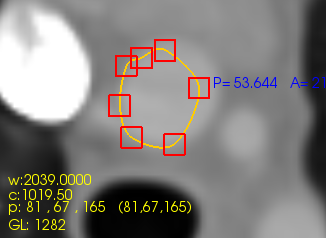
Visualization window
|  |
Button panelThe buttons are divided into six categories:
| 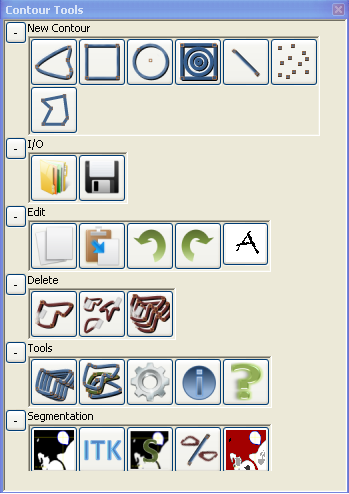 |
New Contour
 Permits the creation of a spline contour. The user selects the points that the contour is to contain, and creaContours creates the curve that goes through all of them.
 Permits the creation of a rectangular contour. The user chooses two points which are opposite and determine the rectangle's side length.
 Permits the creation of a circle contour. The point the user clicks on is a fixed on the circumference; the user can then choose the center and the radius of the circle.
 Permits the creation of a bull-eye shaped contour. The user simply chooses where to place it and how to size it.
 Permits the creation of a line contour. The user chooses two points, which define the beginning and the end of the line.
 Permits the creation of a points contour. As its name explains by itself, the user simply chooses where to place the points on the screen. He can have as many points as he'd like to.
 Permits the creation of a polygon contour. As is the case with the spline, the user chooses the points through which creaContours will draw the contour. The difference is that a polygon may have sharp "peaks" and is not, as thus, a soft "curve".
back up
I/O
- Used to open a previously saved contour (*.roi).
- Used to SAVE AS a contour. Contours are saved as .roi files. Then you can use CTRL+S
back up
Edit
- Used to make a copy of the chosen contour.
- Used to "paste" on the screen a previously made copy of a contour.
- Used to undo the last performed action.
- Used to redo an action that has been undone.
Delete
- Deletes the last contour that's been chosen
- Delete all the contours that have been placed on the current slide
- Deletes all the contours that have been placed in all of the image's slices. This means that contours that are not currently visible might be deleted as well.
Contour Tools
- The chosen contour will be replicated across all of the image's slices. As such, changing slices will not cause the chosen contour to disappear
- Smoothing contour propagation
- Mirrors a contour. The user chooses the mirroring axis and the contour that's to be mirrored. The chosen contour will be mirrored around the axis once the user clicks on " mirror="" contour"
- Used to write a tag name to a previously chosen contour
- Flip contour
Segmentation
- Does an automatic segmentation of the current slice of all slices. The process requires the input of several parameters. Click on the button thumbnail to find out more about this functionality
- Automatic segmentation ITK
- Not yet functional. This button should let the user put a snake active-contour on top of the image. This contour could then be dynamically deformed according to the snake mathematical model
Image Tools
- Permits the configuration of several of the window's parameters. Click on the button thumbnail to the left to find out more about this functionality
- Opens a new window where image statistics can be calculated by way of the drawn contours. Click on the button thumbnail to the left to find out more about this functionality.
- Superposes a red image on top of the current slice. This image can then be used to analyse the results of a thresholding process. Click on the thumbnail to the left to find out more about this functionality.
- Superposes a color image on top of the current slice. This image can then be used to analyse the results of a thresholding process. Click on the thumbnail to the left to find out more about this functionality.
- General information about the application and its developers